| Author | Message | ||
| tdukes
Advanced Member Username: tdukes Post Number: 216 Registered: 4-2008 |
I noticed this Sunday just before playing that the pickup selector on my 75 Series I had a crack along the top. Upon further examination I noticed there were no set screws, although the two holes are still there. I assume some type of adhesive was used to glue the knob to the shaft. I called yesterday and ordered a new knob. Now I am wondering how to remove the old knob without damaging the switch. My first thought was to put a hot soldering iron on the shaft below the knob to break the glue joint. But the shaft isn't visible, the knob is against the nut that holds the switch in place. I guess I could try to break the knob along the glue joint? Any ideas? Todd. | ||
| jimmyj
Advanced Member Username: jimmyj Post Number: 304 Registered: 8-2008 |
As you will see when you get the new knob, the set screws are in a metal center piece and only the outer part is plastic. If the plastic outer piece has shifted and you can't see the screws I think your goal should be to break off the plastic revealing the metal piece and gaining access. First check to see if the plastic isn't already loose and you can actually pull it straight off! If that doesn't work you could almost remove the plastic with a wire cutter - being careful not to bend the shaft of the switch and wearing your safety goggles for the flying pieces. Cut the bits away until you find the set screws and can loosen them to get the metal piece off.. 2 cents worth of an idea... Good luck! Jimmy J | ||
| lbpesq
Senior Member Username: lbpesq Post Number: 4947 Registered: 7-2004 |
"wearing your safety goggles for the flying pieces" Jimmy: Sounds like you've had some experience with this type of problem before! A great suggestion. Bill, tgo | ||
| adriaan
Moderator Username: adriaan Post Number: 2863 Registered: 6-2002 |
You might try using a small saw, but I can tell you the plastic on those old knobs is a rather tough cookie. Don't forget to cover up the surrounding area. | ||
| terryc
Senior Member Username: terryc Post Number: 1707 Registered: 11-2004 |
If you have access to a rotary tool(Dremel) and the cutting wheel attachments this would make the job easier but as adriaan suggests, mask the surounding area with multiple layers of tape, preferably that silver backing tape(gaffer tape we all it in the UK) and a good surrounding area as if you slip it could run off onto the finish. A slow steady speed should cut through the plastic surround. I had to remove a broken vol knob from a expensive Strat that the previous owner had glued on with epoxy, the rotary tool worked a treat. | ||
| cozmik_cowboy
Senior Member Username: cozmik_cowboy Post Number: 1078 Registered: 10-2006 |
I would second the tape, but recommend multiple layers of masking tape rather than (duct/gaffers/rock'n'roll/Offical-NHRA-Approved-200-Mile-An-Hour*)tape, as the latter is made to stick, and may well leave residue on your finish, while the fromer is made to come off paint. *As my gear-head big brother calls it Peter | ||
| tdukes
Advanced Member Username: tdukes Post Number: 218 Registered: 4-2008 |
Just tugging on the knob I don't think is going to work. I am going to wait until the new knob arrives to try any of the more "aggressive" techniques. I have a roto-zip tool, but it may be too large to get in close to the knob. Todd. | ||
| sonicus
Senior Member Username: sonicus Post Number: 2068 Registered: 5-2009 |
Hi , I believe that 3M "SAFE RELEASE " 2 inch Blue masking tape would be a good protective tape choice . I have used it for decades with good results on many different projects from Instruments vehicles and high end residential remodeling jobs. http://www.sears.com/shc/s/p_10153_12605_SPM221451385P?sid=IDx20101019x00001a&ci_src=14110944&ci_sku=SPM221451385 | ||
| cozmik_cowboy
Senior Member Username: cozmik_cowboy Post Number: 1079 Registered: 10-2006 |
Precisely the tape I had in mind, Wolf; I should have been more specific. Peter | ||
| sonicus
Senior Member Username: sonicus Post Number: 2071 Registered: 5-2009 |
Peter , I figured that is what the "picture in your mind" was anyway. | ||
| jacko
Senior Member Username: jacko Post Number: 3026 Registered: 10-2002 |
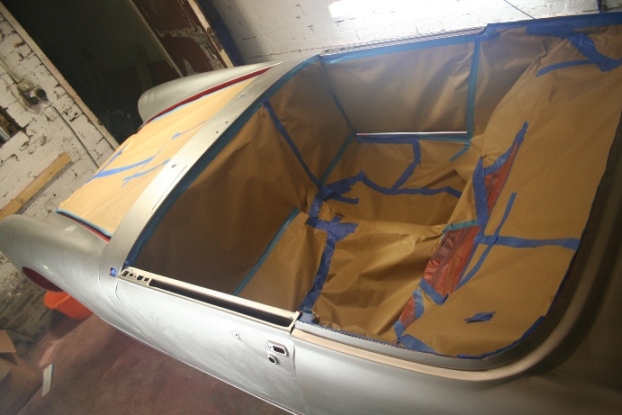
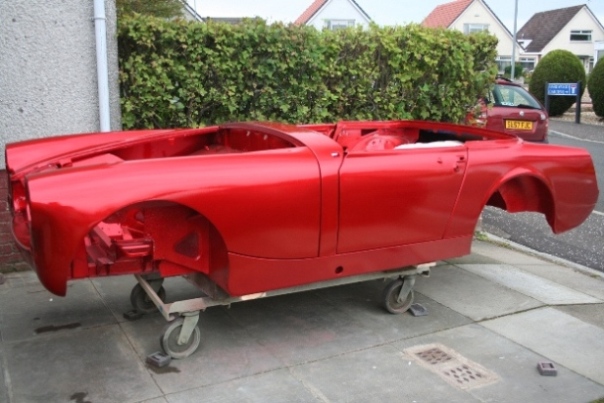
Wolf - That 3M tape is superb. I've gone through 4 rolls of varying widths masking my car during painting. It's pretty robust and it's peeled off with no issues. here's a before and after shot or 2..   graeme | ||
| sonicus
Senior Member Username: sonicus Post Number: 2074 Registered: 5-2009 |
Graeme, Nice work on the car. This truly looks like a dedicated project that you are doing with ultimate attention to detail. Projects like that satisfy a little place in my heart. Thanks for showing me the pics . Wolf | ||
| tdukes
Advanced Member Username: tdukes Post Number: 219 Registered: 4-2008 |
The new knob came in today. The old knob fell apart pretty easy with small screwdriver. The metal center was still on the shaft. I had a little trouble getting the glue out of the allen heads, but other than that the fix was easier than I had thought it would be. Todd. | ||
| artswork99
Moderator Username: artswork99 Post Number: 1590 Registered: 7-2007 |
Good to hear! | ||
| jimmyj
Advanced Member Username: jimmyj Post Number: 305 Registered: 8-2008 |
Nice going Todd! A good conclusion. For me, that selector switch gets a mighty workout. Always thrown to mute position between songs, takes, etc. It's such a habit that even when I'm not plugged in I automatically throw the switch before I play. Ha! I think I've only broken one knob in all these years so I now carry spares. Alembic gear was designed for the road and is built like a tank. Failure of any kind is extremely rare. (Fine looking MG there Graeme!) Jimmy J | ||
| terryc
Senior Member Username: terryc Post Number: 1709 Registered: 11-2004 |
Nice paint job G!! Candy Apple Red with a fine metal flake????? | ||
| dela217
Senior Member Username: dela217 Post Number: 1086 Registered: 6-2002 |
Jimmy I'm with you on thw switch. I use it constantly. It's the best mute there is! I also have a couple of instruments where the plastic has broken off and I just use the aluminum center piece as the knob. I actually like it this way. Michael | ||
| jacko
Senior Member Username: jacko Post Number: 3027 Registered: 10-2002 |
Terry. on top of the primer it's.. 4 coats of metallic silver base 5 coats candy apple red base (this is a translucent paint to let the metallic shine through) 6 coats of clear-coat. Now needs wet-sanding and buffing. Sorry for the hijack Graeme |