| Author | Message | ||
| tbrannon
Intermediate Member Username: tbrannon Post Number: 189 Registered: 11-2004 |
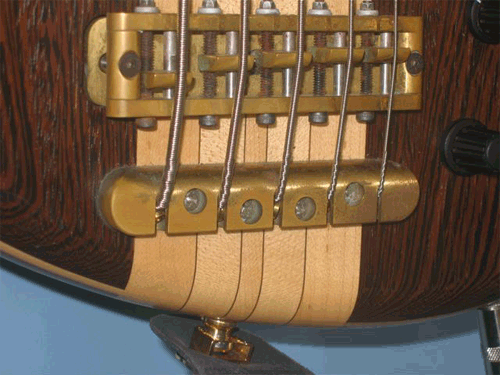
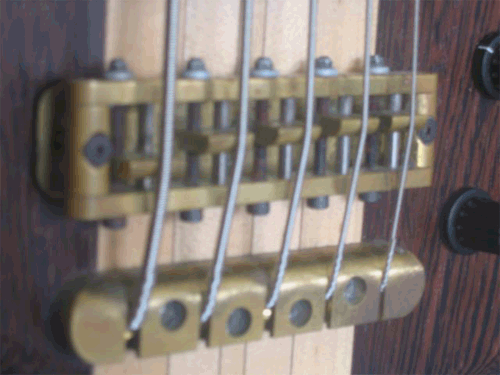
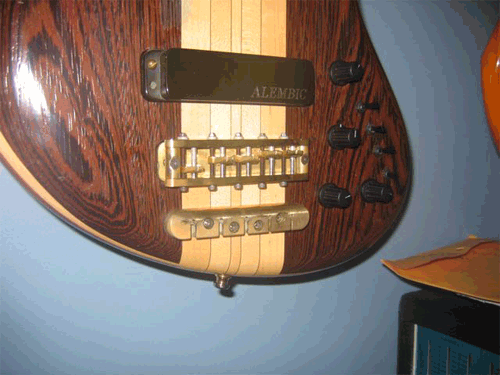
Hello all- My used Rogue arrived about 3 weeks ago- and I'm just getting ready to do my first string change/cleanup. As you can see from the attached pictures, I've got a fairly grungy bridge and tailpiece. I've read the FAQ page on polishing the bridge and I've also searched the forum for hints on polishing- I've got a few questions after reading everything. 1) Flitz isn't avaliable here in NZ- I know it's not avaliable in Europe and that the guys there use other products. I've found a few brands of brass cleaner down here- is there any ingredient I should avoid? Most of the brass cleaners I find down here recommend gloves and other precautions, that doesn't sound like a "gentle" clean. Should I have family that live Stateside mail me some Flitz? 2) I was planning on completely disassembling the bridge- removing it from the body- I'm assuming that I can safely do the same thing with the tailpiece? 3) I've read that the tailpieces are lacquered and shouldn't be polished with Flitz. Based on the tarnish you can see on the tailpiece, I'm assuming that ruining the lacquer coating isn't an issue in my case. Correct? That's about it for now- thanks for taking the time to respond. I figure an ounce of prevention is worth a pound of banging my head against the wall after I've screwed something up.   | ||
| bob
Senior Member Username: bob Post Number: 719 Registered: 11-2002 |
For those of us who can get it easily, Flitz happens to be quite effective and easy to use. It is certainly better than many, but I don't believe we're talking an order of magnitude, or class by itself sort of thing. As long as you take the parts off the instrument, and be sure to clean off any polish residue when you're finished, then there is no reason to worry about being gentle. It's brass, it can handle it - the only reason to be concerned in this regard would be if you were polishing in place, in which case some products might damage the finish on the wood. With very rare exceptions, the tailpiece is simply attached with wood screws, and can be easily removed and re-installed. Try taking out one of the screws to confirm, but it shouldn't be a problem, and for a clean up like this I would certainly prefer to remove it. Ah yes, the lacquer... it's great while it holds up, but when that's no longer true, you may wish you never had it in the first place. Once it starts to peel, or separate and allow corrosion underneath, then the only thing you can do (as far as I know) is to remove all of the lacquer and go back to bare brass. This can be a real pain. Fine sandpaper or maybe steel wool works on the accessible portions (given enough patience), but could make a real mess of the slots and holes if you aren't incredibly careful. I should think there may be some etching or acid approaches that might work, but don't really know anything in this area. Hopefully someone else will chime in on that. In the meantime, my suggestion would be to start simple: take the tailpiece off, try cleaning it up with the most highly recommended brass cleaner in your area, and see how it turns out. It's kind of a big step to remove the lacquer, so don't unless you have no other choice. -Bob | ||
| tbrannon
Intermediate Member Username: tbrannon Post Number: 190 Registered: 11-2004 |
Thanks Bob! What you suggested is exactly what I was going to do, but I've found it's always a good idea to get a few experienced opinions in situations like this. Any other help from people is appreciated. I'll be sure to post some pictures when it's all cleaned up. Toby | ||
| tbrannon
Intermediate Member Username: tbrannon Post Number: 191 Registered: 11-2004 |
A couple hours work makes a huge difference! I lemon oiled the fingerboard and cleaned up the bridge (although the bridge mounting block underneath seems to be beyond polish). The tailpiece looks better- I'll have another go at it in a few months.  | ||
| bigredbass
Senior Member Username: bigredbass Post Number: 1059 Registered: 9-2002 |
When I originally got the BigRedBass, the hardware was in about the same shape. So I removed the bridge, took it apart completely and polished/cleaned up everything with brass polish, lubed the saddle screw threads, the whole nine yards. Put it back together . . . backwards! The saddles were facing the wrong way. Geez . . . So if YOU do this, I always urge people to make a little diagram first: That way you only have to reassemble it once! Not knowing what the brands are where you're at, I'll make some 'generic' suggestions. I use a teflon-based lube for the moving parts (saddle screws, bridge screws, etc.). The type I use is actually for firearms, a little goes a long way. I'm sure there's several brass polishes where you are. Another thing that works is car wax, preferably carnauba-based. Takes most gunk right off, big shine, and of course leaves a film that helps with any new corrosion. Car wax is also great for getting those fingerprints off the tuning keys that don't seem to come off any other way, BUT can sometimes try to take the gold plating with it, so be careful. I'd try an out of the way, tiny spot first. The lacquer on the bridge is a sanding job, followed by polish. I'd think there must be some sort of dip in lacquer thinner, etc., that would take it off, but I don't know what you would use. Just use a very fine grit sandpaper, and you'll end up with a satin finish, just like it's supposed to look. My Emperor Ming tailpiece is still clean, so I've managed to avoid this, so far. I've never tried to clean a sustain block, so I'm no help there. J o e y | ||
| tbrannon
Intermediate Member Username: tbrannon Post Number: 192 Registered: 11-2004 |
Thanks for the suggestions Joey- I've brought it to work today (I love my job)- and I'm gonna have another go at it today. I thought I did a pretty good job on the intonation screws, but upon further review- I'm not happy with my work there and the sustain block is gonna get some serious love today. I'll pick up some Carnuba based wax and apply a coat today after I've used the brass polish- Thanks so much for the tips fellas! | ||
| bob
Senior Member Username: bob Post Number: 720 Registered: 11-2002 |
Don't be afraid to take out the sustain block either. This probably has machine screws with threaded inserts. But if you do remove it, I would suggest immediately marking the bottom (permanent marker, or maybe a small scratch) so that you know which direction it goes. It is generally a pretty snug fit, and the holes (in either the block or the body) may not be perfectly symmetrical. Sorry, don't know whether these are typically lacquered or not. | ||
| tbrannon
Intermediate Member Username: tbrannon Post Number: 193 Registered: 11-2004 |
Bob- I took the sustain block out this morning and brought it in with me. Mine is attatched via a single wood screw in the middle. Unfortunately, my bridge block is slightly loose in the routed hole. I'll clean it up and when I re-install it, I'm going to have to slightly shim it to get it snug. I noticed last night that when I took the strings off, the bridge wiggled slightly- It won't take much to shim it up and get it real snug. Thanks for the help and suggestions. If you come up with any more, let me know. | ||
| lbpesq
Senior Member Username: lbpesq Post Number: 1725 Registered: 7-2004 |
I, like Joey, used to diagram just about anything before taking it apart. Now I just take a few digital photos before, and often during, disassembly. Sure makes it easier to get everything back in the right place. Technology does have its advantages, sometimes. Bill, tgo | ||
| bob
Senior Member Username: bob Post Number: 721 Registered: 11-2002 |
(oops, forgot that I made a special request for two screws in my block...) The wiggling bridge might just be due to the play in the height adjusting screws (and is perfectly normal), though it sounds like you are looking at this closely enough to understand whether the block itself moves. If you do feel the need to shim it, I suggest you do so around the edges. My personal take is that you want to have maximum, smooth contact between the base (bottom) of the block and the wood, so while you're in there check for any odd drips of finish, or perhaps a burr or dent on the brass, that might prevent it from seating nicely. If the block itself still moves, after getting the screw (singular) nice and snug, then shim as you please. You want it to be as much an extension of the wood as possible (or vice versa), and the more contact, the better. | ||
| tbrannon
Intermediate Member Username: tbrannon Post Number: 194 Registered: 11-2004 |
Bill- I took heaps of digital photos before starting- Technology does have it's advantages. Bob- In terms of the wiggle, it's exactly how you've assumed it is. it's not a height issue- the required shim will be placed along the side. When the block slides down into the routed hole, it's got just a bit of wiggle room along the long edges of the block (facing the neck and tailpiece). A couple small shims along one of those edges will snug it into the routed hole nicely. The contact on the bottom is very good. Thanks again- your pointers have made a difference. Keep 'em coming as you see fit. Toby | ||
| tbrannon
Intermediate Member Username: tbrannon Post Number: 195 Registered: 11-2004 |
I had another go at it & am happy to report that the bridge block cleaned up nicely. It's shining like a star now. I didn't have as much luck with the tailpiece, but that's OK- I got the grunge off and I'm happy with that for now. Thanks again- I'll post some picture once I've got the new strings on and the action is where I like it. Toby | ||
| terryc
Member Username: terryc Post Number: 78 Registered: 11-2004 |
Same thing was on my used MK model, laquer had broken down and tarnished the brass, I used a Dremel tool fitted with the small brass abrading brush to remove the old laquer, Nitromors(UK chemical laquer remover) us good as it can be washed off and does the trick. Brasso/Duraglit metal polishing wadding is what I use, I have considered respraying the brass parts with laquer after polishing but I think if you polish the parts well they almost look gold like | ||
| terryc
Member Username: terryc Post Number: 79 Registered: 11-2004 |
Same thing was on my used MK model, laquer had broken down and tarnished the brass, I used a Dremel tool fitted with the small brass abrading brush to remove the old laquer, Nitromors(UK chemical laquer remover) is good as it can be washed off and does the trick. Brasso/Duraglit metal polishing wadding is what I use, I have considered respraying the brass parts with laquer after polishing but I think if you polish the parts well they almost look gold like | ||
| tbrannon
Advanced Member Username: tbrannon Post Number: 211 Registered: 11-2004 |
Thanks for the input Terry- The tailpiece isn't quite where I want it, but I don't have a dremel tool handy and now that it's in pretty decent shape, I just can't bring myself to disassemble everything again. I've got the "I can't put it down" bug. In a bad way. Thanks- Toby BTW: I put a fresh set of Chromes on it and set the action right where I like it. Boy oh boy!!! | ||
| davehouck
Moderator Username: davehouck Post Number: 4483 Registered: 5-2002 |
Late to the thread, but another suggestion for others; as you take the bridge apart, lay the parts on your bench in the same configuration as they came apart, as in an exploded diagram. Pick up a part, polish it, and put it back down in the same place. |