| Author | Message | ||
| edwardofhuncote
Junior Username: edwardofhuncote Post Number: 31 Registered: 6-2014 |
Thought I'd share something with the Club here... a little background first - I learned to work on and build musical instruments from my Dad at about age 12. A few years ago, after I bought my place here in the mountains of Southwest Virginia, I finally built a real shop to work on upright basses in. You really have to tool up for that kind of work, and have plenty of room. So I do repair and setup, mostly as a hobby, but I make a little $$$ doing it too. (and then promptly blow it on basses or gear) There was a time when I thought this was what I wanted to do for a living... I even spent a summer as an apprentice to a violin repairman, or really, just being in his way. Turns out I'm better at my day job and it pays more.� So a recent confluence of events reminded me of a project buried in the sawdust of my shop and mostly forgotten. I have decided to try making something useful out of the husk. It began as a fretless bass guitar project, I think in the late 1980's, but I simply hadn't the skills or knowledge to make anything of it at the time. I had just learned to use a planer and joiner, and began glueing together blocks for a solidbody guitar. In my head, it was the best idea I'd had since that glorious day when I invented chocolate cool whip. Then when it came time for the more critical steps... epic fail. Just never could bring myself to pitch it in the scrap box.� So I'm going to do this kinda' like a build thread, and post some pictures of progress along the way. I've already gotten started, but will wait until the pictures are resized to post the first installment.� Critique along the way welcomed... this bass is going to be heavily influenced by both modern-day Alembic, and adaptations on various designs of luthier Rick Turner, past and present. Both of those are pretty tough standards to match, but really, I'm just testing my own limits here... having a little fun.� | ||
| elwoodblue
Senior Member Username: elwoodblue Post Number: 1566 Registered: 6-2002 |
I'll be following ;) | ||
| sonicus
Senior Member Username: sonicus Post Number: 3980 Registered: 5-2009 |
This will be very interesting. As the novice that I am ; I love to learn from watching. I once refurbished a Double Bass that needed the entire neck to be reattached. I also fixed holes in the side and re-shellacked the whole instrument. I sold that Bass around 2005 but acquired it in three pieces in the late 1980s and stored it until I reassembled it around 1991 when my Girl Friend moved out. I took about 6 months slowly doing the job. It actually sounded decent when completed. When I started the repairs I had never done some of the particular procedures before and went around very cordially asking questions of many luthiers and Violin technicians. The old craftsman that offered me the most practical guidance was a fellow who worked at a stringed instrument rental and sales business. That business had a contract with the Berkeley Unified School District . I did all the work in a tiny apartment before I found my house. I also once did a broken headstock repair on a bass and tried to do laminations Alembic style. I actually sold that bass many years ago. It was a "Stars Guitars" made Bass .I did that on my kitchen table in the same tiny apartment . It also played well after the repair. More recently I picked up an uncompleted fretless bass project from a local guitar show. I completed it and it plays well . I intend to keep that one for a while . I keep learning in the process of new territory for me and many times I have NO IDEA how deep the water there is ! I figure that if I just keep swimming slow that eventually I will get back on land without getting tired and sinking .  So far so good . I can float but swim really slow . So far so good . I can float but swim really slow . (Message edited by sonicus on March 17, 2015) | ||
| peoplechipper
Senior Member Username: peoplechipper Post Number: 578 Registered: 2-2009 |
I have learned so much from 'the seat of my pants' I repair guitars/basses and am self taught; I am a trained goldsmith but have learned SO much more from saying "yeah, I can do that" then having to figure out how to actually DO that...once or twice I've failed, but far more often I've pulled it off and learned tons in the process...Tony | ||
| edwardofhuncote
Junior Username: edwardofhuncote Post Number: 35 Registered: 6-2014 |
Let's start with a short virtual tour of the shop. This is pretty much the whole thing... 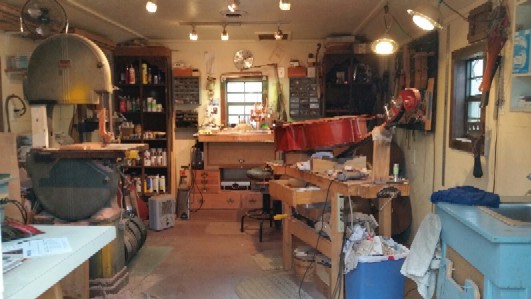 Now, you've seen it all... told you it was a short tour. Here's a pile of hopeless cases and future projects. Can you tell which is which? (sometimes I can't either) 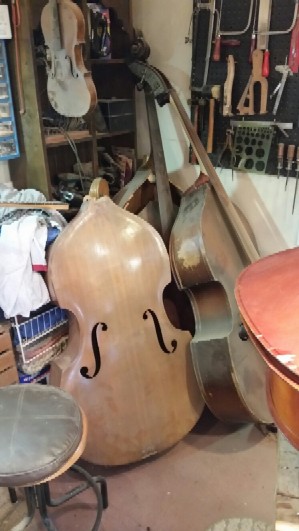 | ||
| sonicus
Senior Member Username: sonicus Post Number: 3985 Registered: 5-2009 |
That is a nice work space . It is nice to know that all the patients in waiting will soon produce wonderful sounds once more. I am very interesting and excited about this thread ! There will so much to learn here . Wolf | ||
| elwoodblue
Senior Member Username: elwoodblue Post Number: 1567 Registered: 6-2002 |
That's a Big Jig ! ; ) | ||
| edwardofhuncote
Junior Username: edwardofhuncote Post Number: 36 Registered: 6-2014 |
Thanks Wolf! Stay Tuned... Well, I'm shrinking the pictures a batch at a time... Here's the neck I bought at the aforementioned sale... I have no idea what it was from, but it immediately drew my attention because of the headstock shape, which is kind of a cross between a Rick Turner pointed shape, and an Alembic cone shape. The important thing was that it was structurally sound, and wide enough for a five-string conversion. 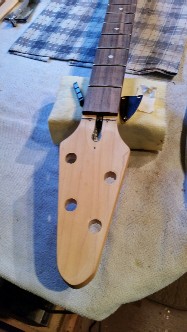 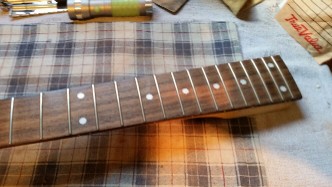 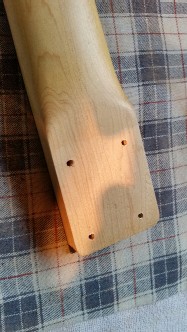 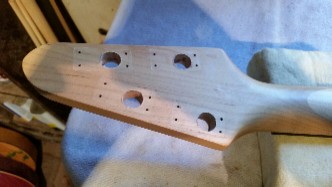 | ||
| edwardofhuncote
Junior Username: edwardofhuncote Post Number: 37 Registered: 6-2014 |
So like I said, the whole point is a five-string conversion, but the headstock has four holes for tuners, and another sixteen holes in the back for mounting screws. The tuners were junk, so I pitched them in a parts drawer right off. There's no veneers on the front or back of the headstock, which is good, saves me having to peel them off. I drilled out the existing holes to an exact 5/8ths diameter, then carefully cut four pieces of 5/8" maple dowel. Mixed up some five-minute epoxy with some dust from my bandsaw, and used masking tape to secure the plugs in place until the epoxy set. Using toothpicks, the screw holes were plugged too. Afterward, I flushed up the front and back of the plugged headstock on the belt sander, taking about another 1/16" from each face. That's the hardest part, since the belt sander would destroy the fingerboard. I had to sand it off turned 90 degrees. Nerves of steel, lock-pickers touch, done. <sarcasm> Seriously, that was a tricky step, that you won't find in the luthier's handbook, and might get you reprimanded or fired from Alembic. =) 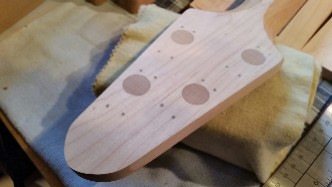 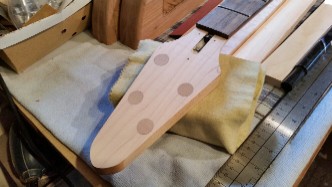 Did roughly the same procedure to the four holes in the heel where the neck bolts were. I used threaded dowel for this job, since the holes don't go all the way through, there needed to be a way to let excess glue squeeze out. More 5-minute epoxy and band-saw dust, tapped these dowels in with a fret hammer to ensure they seated firmly in the bore. I cut the ends off with a flexible flush-cut saw, then went back to the belt sander. You've seen the before ^^... here's during: 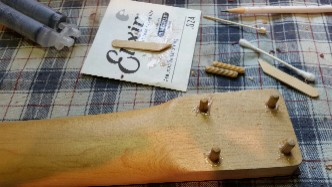 ...and after: 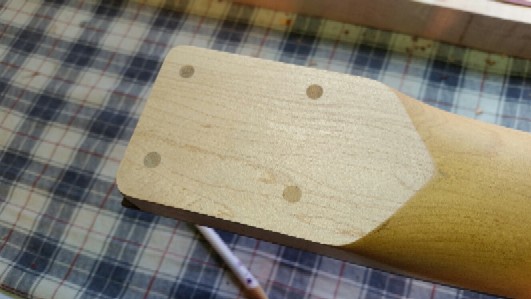 (Message edited by edwardofhuncote on March 19, 2015) | ||
| edwardofhuncote
Junior Username: edwardofhuncote Post Number: 38 Registered: 6-2014 |
The next installment is going to be a little more detailed, since I'm getting beyond the "bull" work and getting into detail. The work has already been done, but I need to write a post to go along with the illustrations... I'll tease it with just this one picture and a hint. For the next step, I'll be using this incredible block of birdseye maple. Since her penchant for knotty maple has been well-documented, I've decided to name this very helpful little block of wood "Mica". LOL! =) 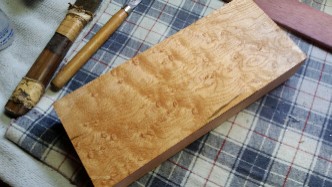 (Message edited by edwardofhuncote on March 19, 2015) | ||
| peoplechipper
Senior Member Username: peoplechipper Post Number: 582 Registered: 2-2009 |
That is a nice workshop; I wish I had that much space but mine is maybe a quarter that or less, and not nearly so organized; sadly in some respects I've always had jewellery work on the go so I've not been able to completely clean my jewellery bench in 15 years, so it looks a bit like Francis Bacon's painting studio (maybe 10%, look up photos of it,it's nuts...) anyway, I don't have room for cool wood toys so woodwork is all hand toys as I am geared toward precious metal and flames...Tony | ||
| elwoodblue
Senior Member Username: elwoodblue Post Number: 1568 Registered: 6-2002 |
"Nerves of steel, lock-pickers touch, done." Now that's living on the edge !! I'm going try and quote you from time to time. I'd love to see a thread of members' desks/benchs/creative messes. I have a few that I know will bear fruit this year ( I hope ). | ||
| edwardofhuncote
Junior Username: edwardofhuncote Post Number: 39 Registered: 6-2014 |
Thanks Fellas! I appreciate you guys following this... it's kinda' motivational. I have a very good friend in Bristol, Tennessee who is a goldsmith and jeweler by trade. (and a MONSTER guitar player) He gets me saw blades for cutting precise pearl inlay and metal when I need them. I enjoy watching his workbench too, allthough it's as littered with tiny bits of metal as mine is with wood shards. Be careful quoting me elwoodblue, as my Mom says that'll just get you a heapa' trubble, but you can quote her all you want. =) Seriously, that belt sander trick was a seat of pants move, but one I've done a lot... but most definitely NOT recommended, unless you have a large scrap box you don't mind emptying daily. I do enjoy my shop time. Back when I used to work a 3-midnight shift, which left me all day long to work in the shop, I was up there a lot more, but in the past couple years since I started working a regular daylight shift, it's taken a backseat to actually playing music more during my time off. Because of that, I have a pretty sizable backlog in there at the moment, awaiting my attention. In between steps on this project, I'm actually working on turning two unplayable half-size upright basses into one instrument, suitable for a kid to learn on. (this is the dismantled one on the bench in the foreground) I've been stalling on that job for a while, simply because it's such a big one. So, thanks again for following this adventure... stay tuned for updates for later today. | ||
| edwardofhuncote
Junior Username: edwardofhuncote Post Number: 40 Registered: 6-2014 |
Time for some fun stuff - laminations! So now that the original 4 pegholes have been plugged and the headstock is a solid block ready for 5 new bores, time to cover the work for an undetectable finished job. I decided to go with front and back laminates. It'll be much simpler than what the Mothership would do here... after all, what I'm really doing is just hiding the plugged pegholes, but as a nod toward the Elves of Santa Rosa, I'm adding in a layer of purpleheart underneath each curly/quilted maple face, and put a slight bevel on the headstock just to show off a little more of that purple stripe. Remember I took off about 1/16" by sanding each face flush... these laminates will make most of that back up. Nothing hard about the setup here... simply draw an outline of the headstock onto the veneer, and trim with snips leaving about 1/4" overhang. The tricky part of this is how to prevent the laminates from squirming around when clamping pressure is applied and the excess glue starts to squeeze out. Right before clamping in place, I put one small bead of CA glue (industrial-strength super-glue) on the headstock face and a spritz of accelerator, to cure it instantly in place. The glue joint itself is plain old TiteBond. Clamp for 24 hours, then repeat the process for the back of the headstock. Could've done both faces at once, but that would've increased chances for a goof... you only have about 15 minutes to work with TiteBond.  After the clamps are removed comes the fun part for me... this is when the carving and shaping happens. I use several different tools, starting with a Dremel tool fitted with various carving bits and sanding drums, followed by sandpaper. 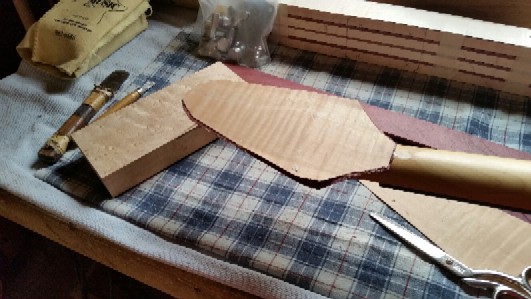 Another seemingly tricky step was relocating the slot for the nut, the truss rod slot and the 3 holes for the truss rod cover. Using the old nut as a guide, and the old truss rod cover as a template... zip - done. My Dad called stuff like that "Old Indian Tricks". I will probably make a brass nut & truss rod cover, another nod to both Alembic and RT. 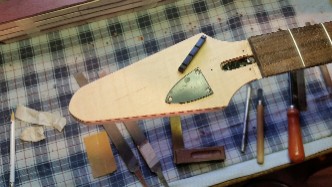 Here's the finish-sanded headstock: 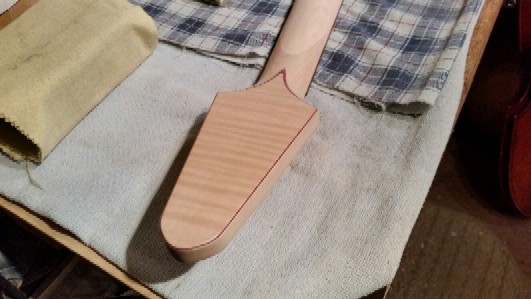 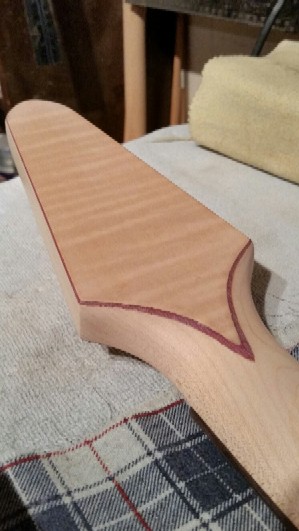  The headstock turned out so well that I decided to give the plugged neck heel the same treatment. Most of this won't even show, but the part that does extend beyond the future neck pocket is a nice visual complement to the headstock laminates. 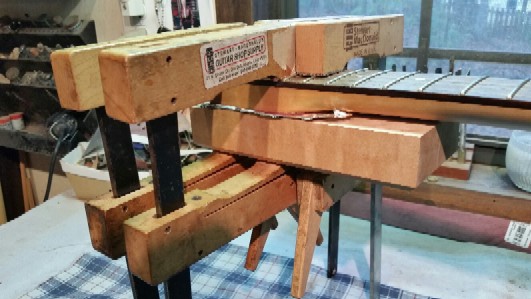 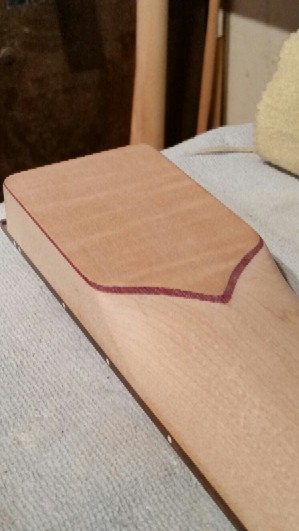 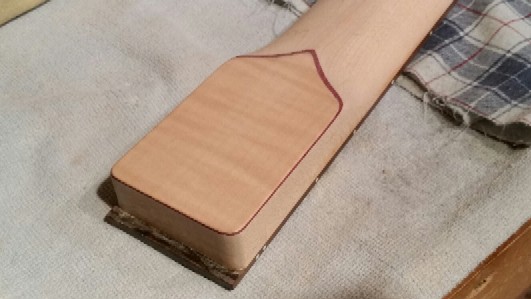 Up next week, reworking the body I made such a hash of back in yesteryear... and then I gotta' start thinking about electronics, and routing the cavities they'll fit into. * Did anyone happen to spot Mica's birdseye maple block in use? =) (Message edited by edwardofhuncote on March 20, 2015) | ||
| pauldo
Senior Member Username: pauldo Post Number: 1456 Registered: 6-2006 |
Gregory, that is some impressive work. I enjoy the play by play on it. :-D | ||
| peoplechipper
Senior Member Username: peoplechipper Post Number: 585 Registered: 2-2009 |
I will post pictures of my workshop sometime, but not now; when the amount of visible floor starts going down, things need cleaning up and that's where I am now, so I'm not gonna show that...liking this project though! | ||
| jon_jackson
Advanced Member Username: jon_jackson Post Number: 216 Registered: 12-2008 |
Very nice! Keep them coming. I really enjoy these types of threads. Jon | ||
| edwardofhuncote
Senior Member Username: edwardofhuncote Post Number: 280 Registered: 6-2014 |
I didn't have any time for whittling this weekend, but for good reason - GIGS! Well, that, and spring has finally sprung here so the fifteen things I needed to do around the house won the battle for attention. I did go up to the shop to ponder and sketch for a few minutes. Now that the neck is ready, the next step is the body. Keeping in mind, this old body is work I'm not particularly proud of, being big and chunky, (incredibly heavy) and a wacky shape on top of that. But all that aside, the core is solid walnut, which if I recall correctly was salvaged from an old table. (literally a coffee table bass!) The laminations are maple and walnut, and were mostly decorative, but also provided a way to book and flip-match the wings of the body. It was not my first time ever doing laminations... Dad taught me how to strengthen a banjo neck by laminating a sandwich of alternating wood in between the two bookmatched halves of a neck. On our earlier instruments, this was all the reinforcement we used. Here's a little tease of the next set of installments... a good size pile of scraps on the bandsaw table and a close in look at the body viewed in profile. 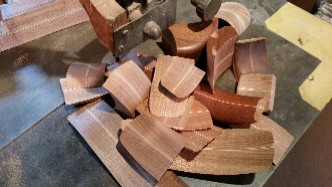 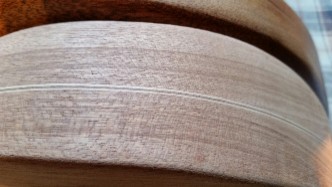 |