| Author | Message | ||
| bob
Advanced Member Username: bob Post Number: 237 Registered: 11-2002 |
I'll take a wild guess and suggest it might be a depth guide for sanding, that will eventually disappear. ??? | ||
| marcm
Junior Username: marcm Post Number: 34 Registered: 12-2003 |
thanks bob! that makes perfect sense | ||
| mica
Moderator Username: mica Post Number: 1716 Registered: 6-2000 |
Bob's right - you'll also notice two other routed channels along the edges. Here's another picture with most of the sanding done: 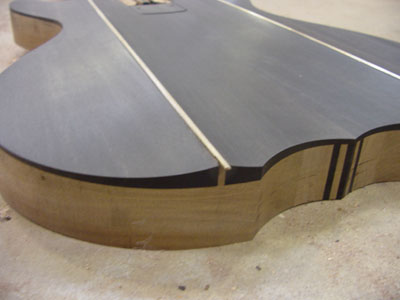 The little sticks protruding past the bottom of each ridge are brass strips to guide the maximum on each side. | ||
| marcm
Junior Username: marcm Post Number: 35 Registered: 12-2003 |
wow! so cool thanks | ||
| hollis
Advanced Member Username: hollis Post Number: 225 Registered: 11-2003 |
Very very nice! | ||
| mica
Moderator Username: mica Post Number: 1761 Registered: 6-2000 |
Here's your bass with the sealer coats: (note: resized MONSTER picture - look on next post) The holes are drilled for the electronics, but I'm afraid you really can't see them in this shot. We're getting into the detail on the knobs. Here's some mock ups to show you where we are: 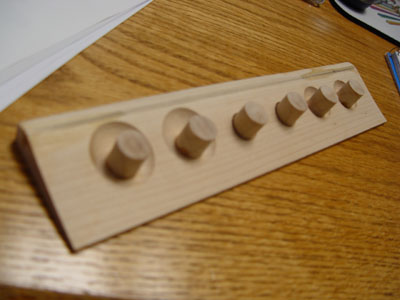 Above: three styles compared. We're trying to illustrate some of the extremes for the cutouts around the knobs to get an idea of what will suit you. 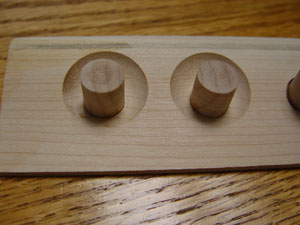 Above: Style #1 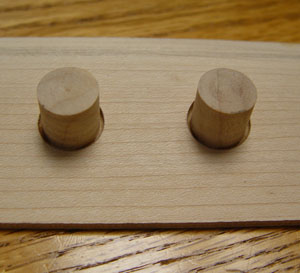 Above: Style #2 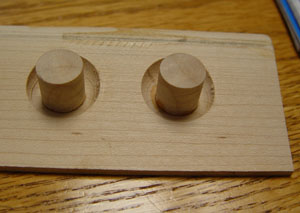 Above: Style #3 I'll reserve my comments for preferences/ideas until I hear what you like. For those watching, the knobs are simple cyllinders of Ebony with Mahogany indicator dots. We're going to try to do the collet style on the pointer knobs, Marc. If it doesn't work, we'll do the standard mounts. (Message edited by mica on June 18, 2004) | ||
| mica
Moderator Username: mica Post Number: 1762 Registered: 6-2000 |
Sorry about that monster pic before. Here's one that you can see on the screen: 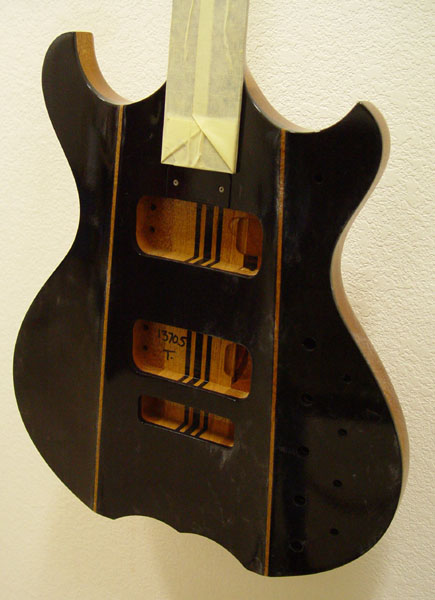 | ||
| marcm
Junior Username: marcm Post Number: 37 Registered: 12-2003 |
hi mica i love the body! the 'suspension bridge' actually provides a bit of an elbow contour, a design feature that was part of the specification before mike came up with his cool idea style #1 is my favorite of these three choices. i'd like the carvings to be relatively shallow, and i like the way the knobs are obviously offset from the center of the carving. could we preserve those two attributes, but make the carvings somewhat smaller, closer in diameter to style #3? another version i'd like to see in mock-up, if possible, is an 'eyebrow' cut above the knob with a flat 'mesa' rather than a 'bowl' or 'crater': as if the carving tool (sander, grinder, what do you call it?) was held parallel to the back of the bass and lowered straight down until it bit into the slope far enough to make a circular flat about the diameter of #3, with the knob offset below center in the flat. that's what i imagined when you called it an 'eyebrow' carving. do you think that's worth looking at? it might not turn out to be as aesthetically pleasing as #1, but it is what i imagined now that i've put my two cents in, please tell me what you think also, is the spacing between knobs in the mock-up the same as on the bass? best regards marc | ||
| bob
Advanced Member Username: bob Post Number: 254 Registered: 11-2002 |
I think I understand what marc is trying to say here, and I agree. Not that I have a 'vote', but what I'd be interested in seeing is something where the routing of the body occurred only on about the top third of the circle - more like an eyebrow than a socket? - and was relatively small, preferably about 30% less than in #3 (or maybe halfway between 2 and 3). Sort of like most of it would work without any routing, and you just notched out the upper portion as the front body surface curved up. Of course, over this small range the surface appears more as an angle than a curve, but maybe that just means the bottom side of the knob floats a little high. | ||
| marcm
Junior Username: marcm Post Number: 38 Registered: 12-2003 |
hi bob that's it exactly! when mica first mentioned it above, she said ron had suggested "a small scallop around each knob, nothing super obvious" the 'craters' are super obvious. hey mica! please read what bob said! can we do that? thanks bob! marc | ||
| marcm
Junior Username: marcm Post Number: 39 Registered: 12-2003 |
hi again mica after my saturday-noon raspberry beignet and coffee, i'm looking at this some more if the bottom of the knob is going to 'float a little high', as bob said, or even if it isn't, the knob could sit in a tight little #2-like socket, with the 'scallop' or 'eyebrow' above it. that would be subtle and cool but i am still in suspense to hear what YOU think marc (Message edited by marcm on June 19, 2004) (Message edited by marcm on June 19, 2004) | ||
| marcm
Junior Username: marcm Post Number: 40 Registered: 12-2003 |
and yet again i see that you've done the routing for the fatboys and the extra-heavy bridge block. will the routing for the tailpiece ("'big bird' tailpiece, recessed into body") be done later? marc (Message edited by marcm on June 19, 2004) | ||
| bob
Advanced Member Username: bob Post Number: 256 Registered: 11-2002 |
So what's this 'extra-heavy bridge block'? Is it deeper, or what? Numbers, please. One other thought on those cutouts: maybe cylindrical (straight sides, flat bottom) rather than rounded? | ||
| marcm
Junior Username: marcm Post Number: 41 Registered: 12-2003 |
(Message edited by marcm on June 20, 2004) | ||
| marcm
Junior Username: marcm Post Number: 42 Registered: 12-2003 |
bob yes, it will be deeper. we didn't talk numbers; i asked mica for it to be as heavy (i.e., as deep) as possible. similarly, the 'big bird' tailpiece will look the same as a standard bird from the top, but it will extend down into the body. i asked for it to be at least as heavy as four individual spyder-style tailpieces put together i agree that the "tight little" sockets for the knobs should probably be cylindrical. but i want to hear what mica thinks before i set my heart on that marc | ||
| mica
Moderator Username: mica Post Number: 1777 Registered: 6-2000 |
Two more cyllindrical variations: 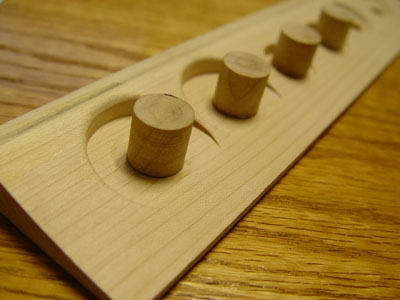 The bottom of the "wells" would be flat and parallel to the back of the bass. We made these over the original bowls, so there's a little vestige of them left. (Message edited by mica on June 30, 2004) | ||
| mica
Moderator Username: mica Post Number: 1778 Registered: 6-2000 |
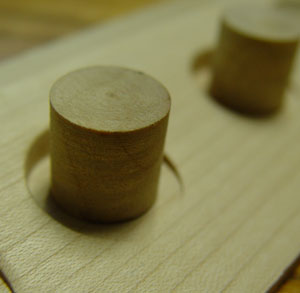 Medium sized version. The thicker bridge block will be routed into the bottom soon. That will be handrouted - what you see routed already was done on the CNC. | ||
| marcm
Junior Username: marcm Post Number: 44 Registered: 12-2003 |
hi mica well now we're cooking with fusion power! this is exactly the look i had in mind (bob, paul tbo told me that you're sailing in the pacific right now, but if you're around, does this look what you imagined?) mica, are the possible diameters of the wells constrained to be the same size as the tools used to make them, or can they be any diameter? my gut feeling is that the perfect look would be somewhere between the large mockup and the medium-sized version. please let me know i'd appreciate any comments by club members best regards marc | ||
| davehouck
Senior Member Username: davehouck Post Number: 691 Registered: 5-2002 |
Marc, Bob is definitely not around right now; his boat started on Tuesday and currently leads its division. It may be a couple weeks before he is back. See this thread for info and links: http://alembic.com/club/messages/449/10880.html?1088673031 | ||
| bob
Advanced Member Username: bob Post Number: 267 Registered: 11-2002 |
Marc, I hope you weren't waiting on me - after all, this is your bass, right? I like this approach a lot. I hadn't gotten as far in my thinking, but since the knobs presumably come out perpendicular to the back, the base of the wells should be similarly so, as Mica et. al. came up with. Nice. The first one is way too wide, the second is a little bit tight looking, so I'd go about 1/3 from small to large - but I think anything in between would be great. Hope this instrument is closer to you than it was a few weeks ago. -Bob | ||
| mica
Moderator Username: mica Post Number: 1885 Registered: 6-2000 |
I'm so sorry I didn't get these pictures posted sooner for you, Marc. This sample has been ready for close to a month now, and finally your bass is at a stage where it's not moving forward until we get this part settled. So here's the latest samples; 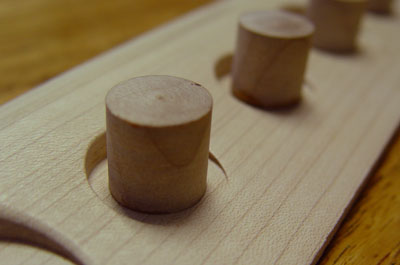 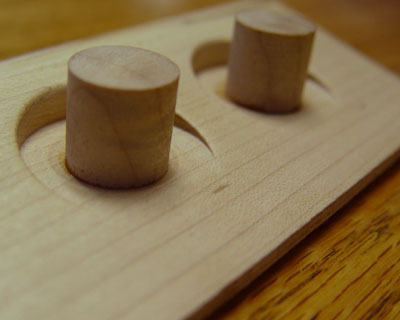 Let me know if we're close to the mark on one of these so I can stop being the reason your bass isn't moving. Mike is really chomping a the bit to do the cuts on the real thing. | ||
| marcm
Junior Username: marcm Post Number: 45 Registered: 12-2003 |
hi mica no worries on the inevitable passage of time. i've had a lot to keep me busy the first image looks like the earlier 'medium sized version'. the second image is exactly what i was hoping for. if you agree that the scale of the carvings will work with the overall aesthetics of the bass, then please ask mike to proceed. if not, please tell me thanks best regards marc | ||
| palembic
Senior Member Username: palembic Post Number: 1500 Registered: 9-2002 |
Marc ...yes of course you're a busy man!! How did the Belgian beer and snack -day went?? Or ...did not happened yet?? Paul the bad one | ||
| mica
Moderator Username: mica Post Number: 1896 Registered: 6-2000 |
Just gave Mike the go-ahead on the knob carvings (a bunch of us are working late). Those samples are done very quickly (and some are done over previous examples), the finished product will of course be much smoother than the test pieces. Will keep you posted as more interesting things happen. | ||
| mica
Moderator Username: mica Post Number: 1930 Registered: 6-2000 |
Here's how the knob carvings came out: 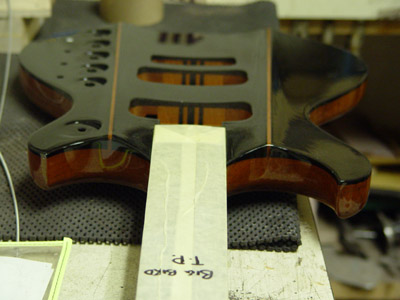 And a little closer: 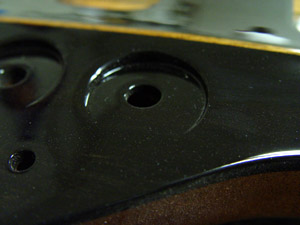 Sometimes I think the instruments are the byproduct and what we really make here is dust. This week you're bass will be preset - that's levelling and fretting, and getting the hardware slotted. While it's back in spray getting the rest of the finish applied, Chris will buff out the hardware and we'll send that to the plater. This will be the first job from the new black plater, so let's hope it goes smoothly. | ||
| palembic
Senior Member Username: palembic Post Number: 1563 Registered: 9-2002 |
Darn lucky you put that simple between " " (how do you call these ???). This is NOT simple ...by no means at all! Quite amazing!!! Paul the bad one | ||
| basstard
Intermediate Member Username: basstard Post Number: 112 Registered: 3-2003 |
Can't wait to see it. It's gonna be absolutely one-of-a-kind!!! But... which Alembic isn't?... ;-) | ||
| mica
Moderator Username: mica Post Number: 1984 Registered: 6-2000 |
Here's the inlay in process: 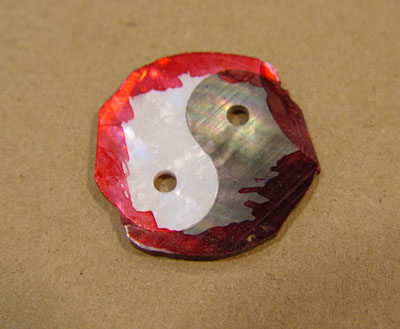 The red stuff is a marking fluid. Once it dries, you can scribe a very fine line in it. Mike's now done with the inlay: 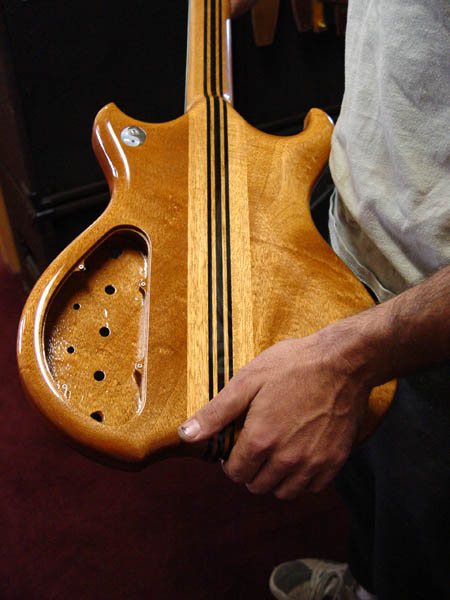 and up close: 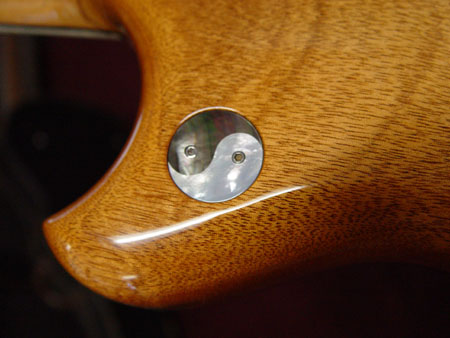 Here's how it works: you take off the inlay plate with carefully placed mounting screws (nice black one will be here soon for the white side): 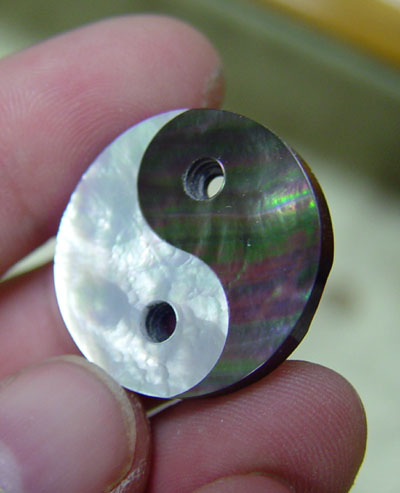 And you get to the brass plate: 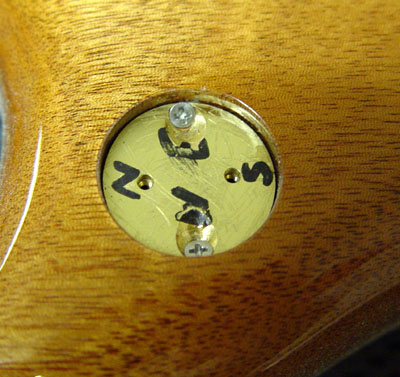 The screws are angled to get the clearance to mount the master volume control. Then the inlay plate mounts to this brass plate for the decorative finish. You won't need to access this hardly ever, so we didn't think the two-tier plate would be a problem. Hope you like it! | ||
| marcm
Junior Username: marcm Post Number: 46 Registered: 12-2003 |
hi mica 'like' doesn't quite express it it's beautiful, and beautifully made, and the mechanical design is terrific thank you mike! best regards marc | ||
| marcm
Junior Username: marcm Post Number: 47 Registered: 12-2003 |
hi again mica i just noticed: "the screws are angled to get the clearance to mount the master volume control" the master volume control i thought we were putting the pickup selector on the lower horn, as on the old series basses. the master volume was going to be to the left of the bridge volume, closest to the baby's butt (your proposed 'style 2' with the master volume added on) wasn't that was the layout we agreed to? please let me know thanks marc |